On June 17, 2022, Connected Life posted this on their corporate website:
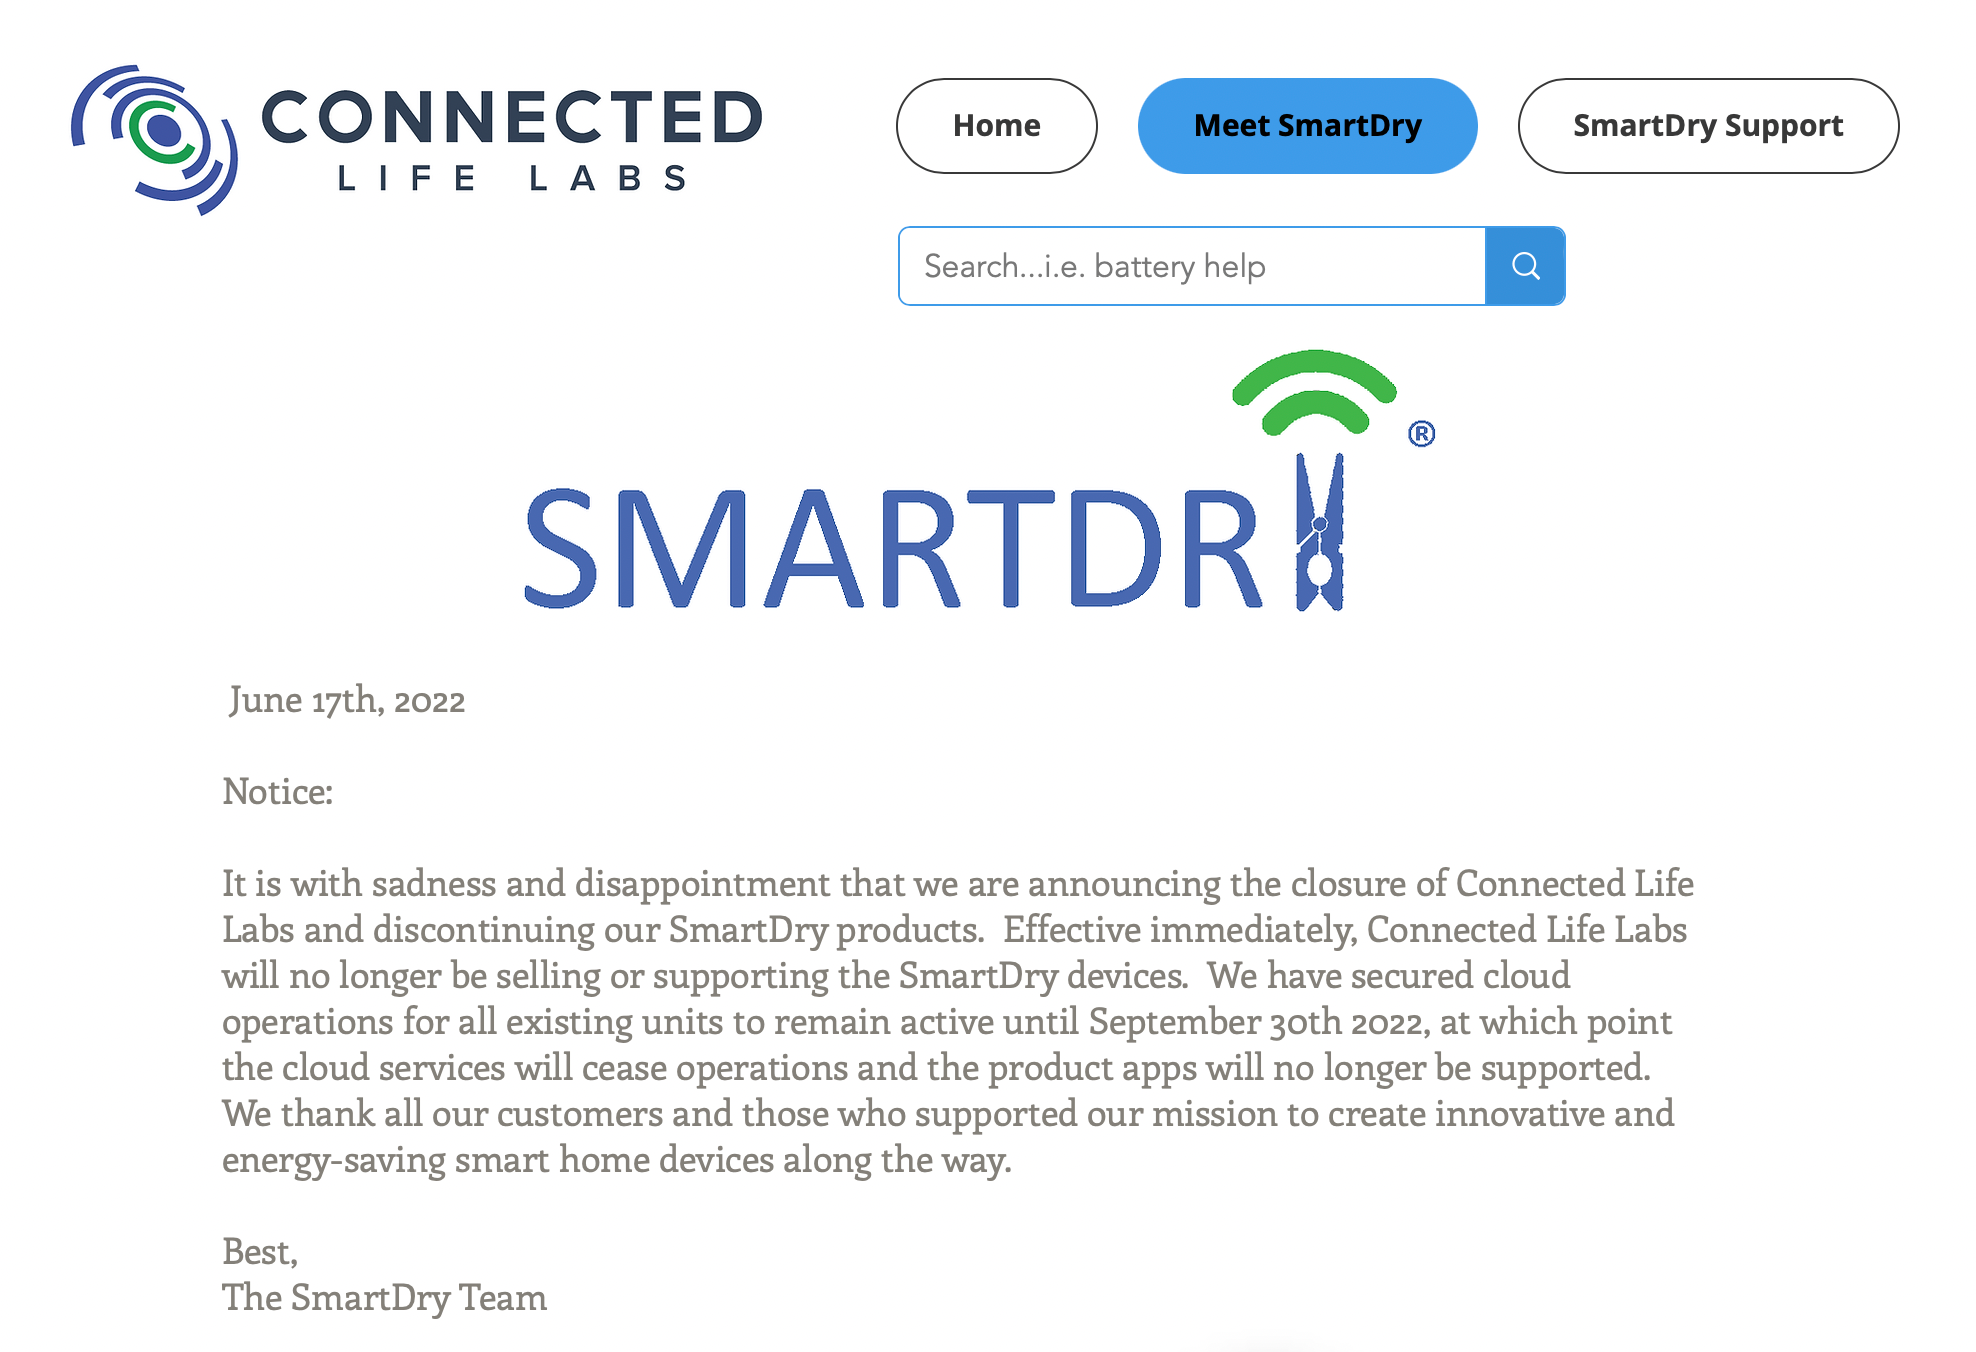
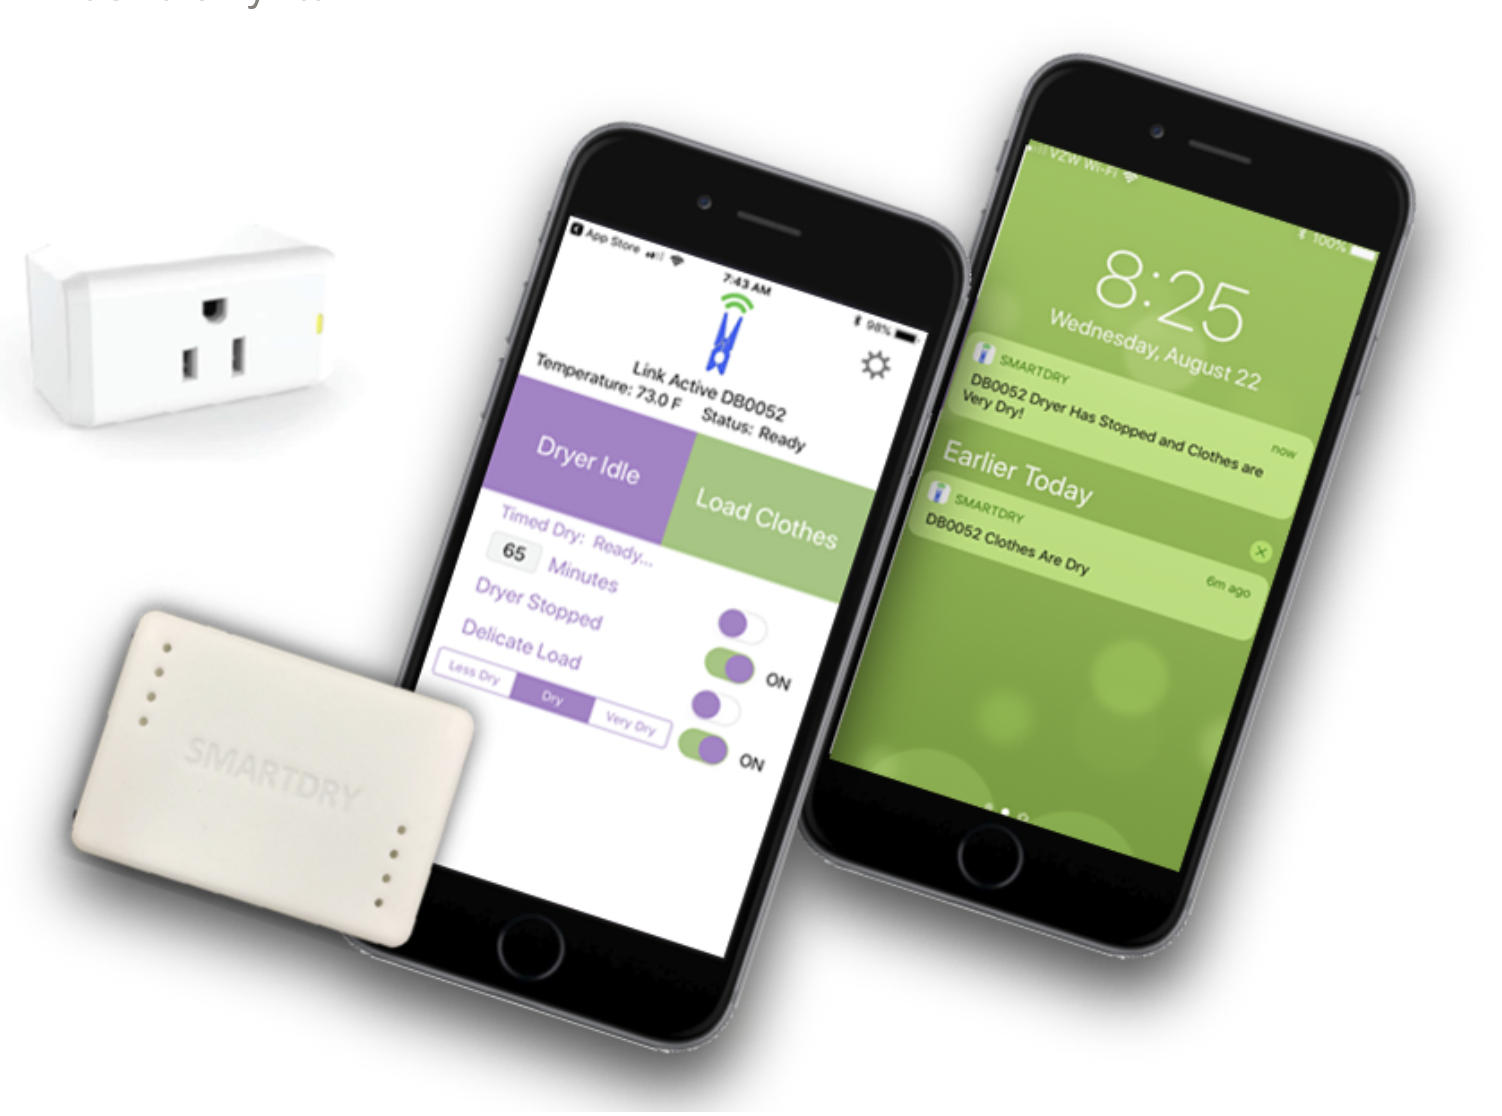
This is disappointing for all of users who have purchased this device. As of the writing of this blog post, you can still purchase these devices on eBay, but that's about it. The SmartDry worked by connecting to a cloud service run by Connected Labs that then pushed notifications to your mobile device via their application. It also had Google and Amazon connections to integrate into those ecosystems. Unfortunately, with the cloud service going away at the end of this month, most people will find they now have a paperweight and most of these will end up in a landfill. That's too bad, because with a little bit of effort, and some minor expense, you can make these devices function locally without a cloud service.
I was one of the first buyers of the SmartDry on October 1, 2019. However, while the SmartDry was useful, my personal home automation is all Home Assistant based and I wanted figure out how to connect it to Home Assistant. I spent some time intercepting the traffic going to their AWS cloud service and then building a REST API call in Home Assistant that allowed me to have the sensors as part of my regular Home Automation setup. That worked fine until Connected Labs announced they were shutting down the cloud service and the API with it. That's when the Home Assistant Community rallied to leverage the work I started with a bunch of smart people to make it fully local.
I personally had nothing to do with the solution I'm documenting here, other than the initial work on the API, all credit for this solution belongs to several users of the Home Assistant Community, specifically: mclever, doublebishop, Jose Torres, and Bryan Gerlach for writing up a mini-guide to get it working. I'm leveraging Bryan's work for the bulk of this article.
Prerequisites
To revive your SmartDry and make it operational locally in your home network, you're going to need a few things, I'm not going to go into much detail on these, but I will link to other resources to get you up to speed.
A working Home Assistant installation. Obviously, Home Assistant is my home automation server choice. You can probably adapt these instructions to make it work with Hubitat, SmartThings, etc, but you're on your own there. To get a working Home Assistant setup there are no better instructions than the official documentation. Head over there and when you have it up and running, come back.
An ESP32 Development board. The SmartDry, fortunately, is actually pretty dumb. It's just an ESP32 device that has a couple sensors and is broadcasting the value of those sensors over Bluetooth Low Energy (BLE). We're going to use another ESP32 to monitor for BLE transmissions, filter for the SmartDry, and then pass the values into Home Assistant via the native ESPHome integration to our ESP32 Development board. The link above is to the exact board I purchased myself for this purpose. The USB-C version also works, but I had more USB-A power adapter plugs laying around, so that's what I used.
That's it, once you have the above two things operational and in-hand, you'll be ready to follow the rest of this guide and get your SmartDry operational again.
Installation
Bryan Gerlach provided the write-up I leveraged to get mine working, I'm just going to clean it up a bit and add some color commentary.
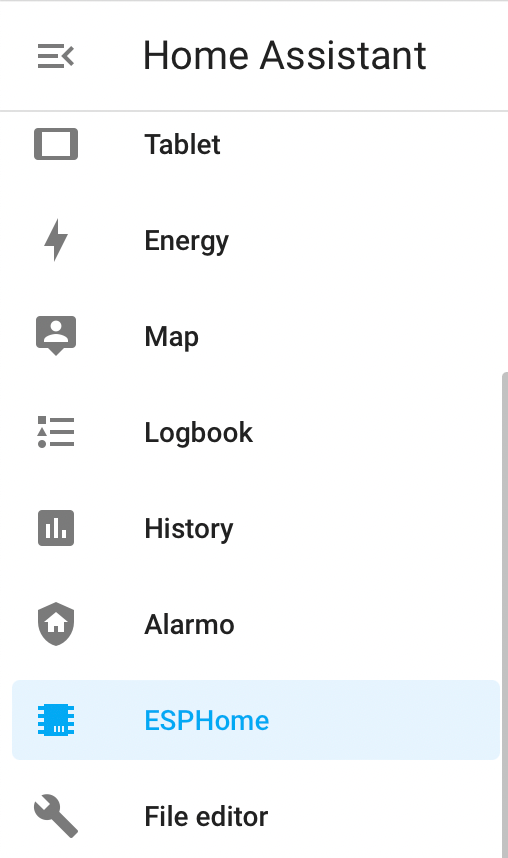
Install the ESPHome add-on in Home Assistant
To do this select Settings > Add-ons. Click the Add-on Store button in the bottom right of the screen and then search for "ESPHome" and select the one that says ESPHome (not the beta or the dev one). Once that's installed you'll now have a new menu in your sidebar called "ESPHome".
Define secrets.yaml and Install the ESP32 board
The ESP32 board you purchased doesn't have any configuration on it and it won't know how to connect to your WiFi network without a configuration. To begin the configuration you first need to specify your wireless network settings so they won't be hard-coded on the ESP32. Click the ESPHome menu from the Sidebar, and then click the SECRETS button in the header:

You'll then be presented with the configuration for the "secrets.yaml" file where you can define your wireless network name and password:
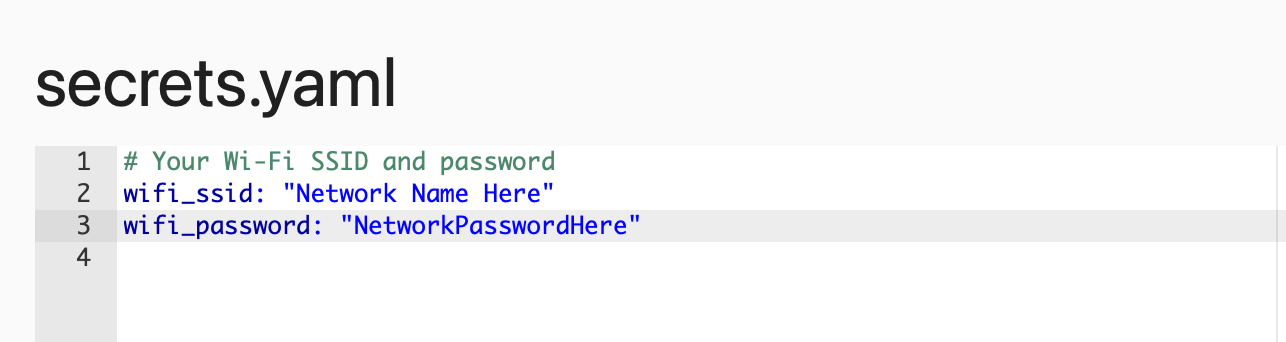
Define your "wifi_ssid" and "wifi_password" in this file, replacing the proper information within the quotes on each entry I have above.
You'll now take your ESP32 board and using a USB cable plug it into an available USB port on your Home Assistant server, that should power it up and make it accessible. Once it's powered up, go to Home Assistant and click the ESPHome menu from the Sidebar. Click the + NEW DEVICE button in the bottom right and you'll probably get the following error message:
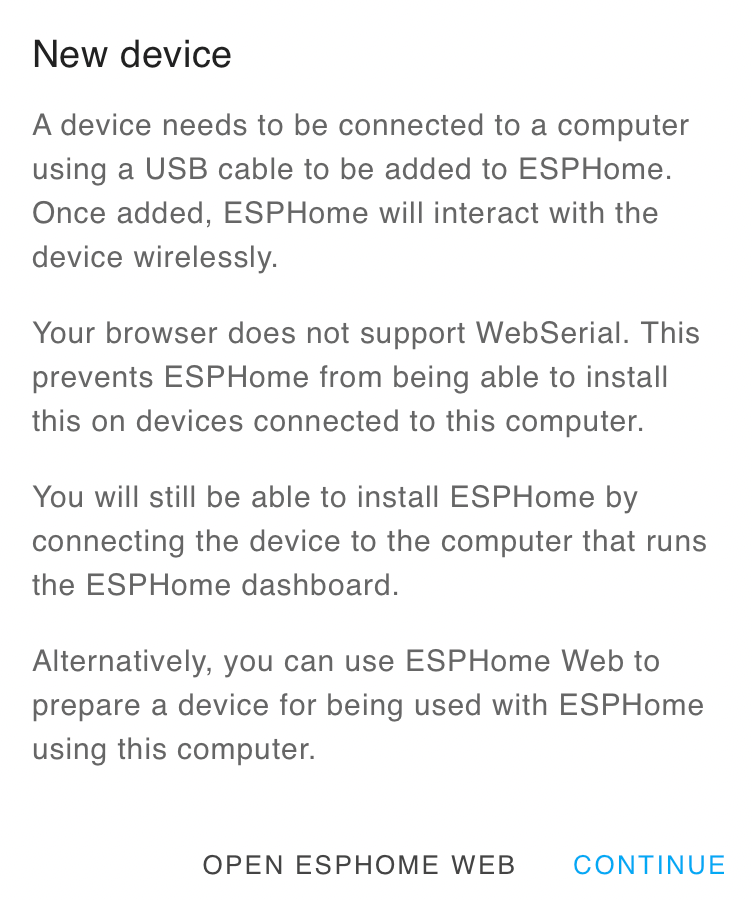
What this is saying is that ESPHome can connect to USB devices plugged into your computer through your web browser if that browser supports "WebSerial", regardless of whether or not you see this error message, we've plugged the device into your Home Assistant server, so it won't matter. Just click CONTINUE.
Configuration
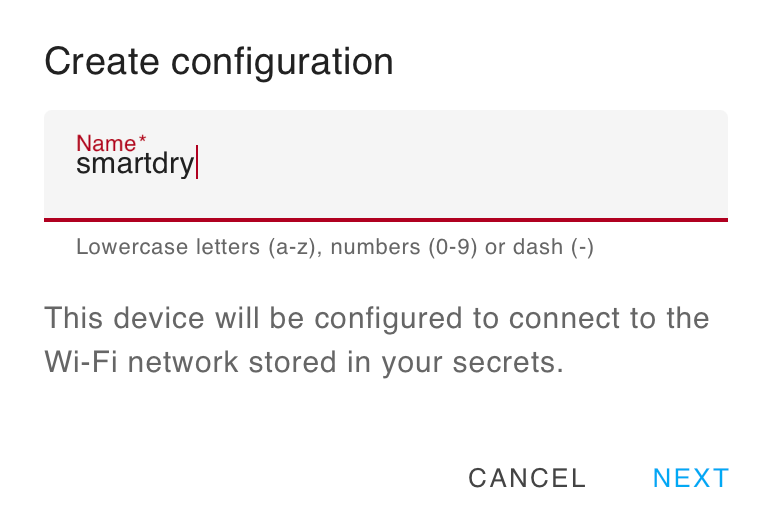
You should now be presented with a dialog box asking you to name your configuration, I used "smartdry". Then click NEXT to proceed.
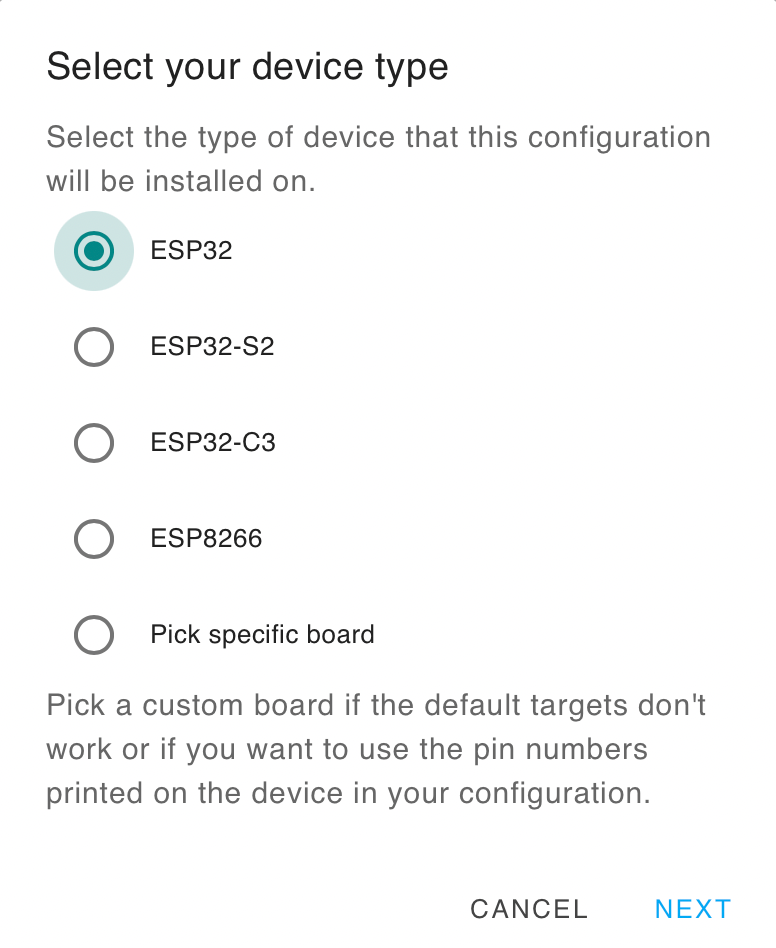
You'll now be presented with a dialog box to select the type of ESP32 board you have, select "ESP32" and click NEXT.
You should now receive a "Congratulations" for creating a new configuration and you'll probably see it pop-up on your Home Assistant dashboard in the background, but hang tight we're not there yet.
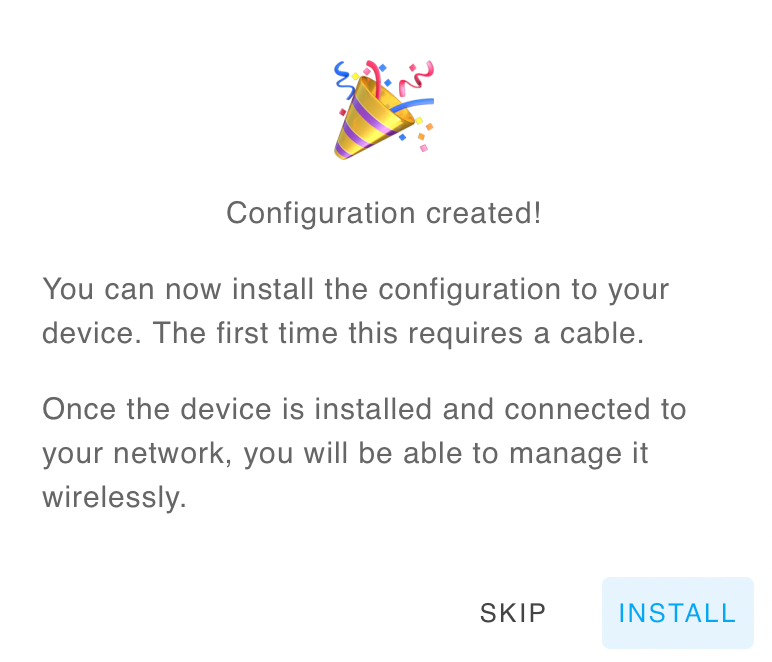
Click INSTALL to move to the next step in the initial configuration.
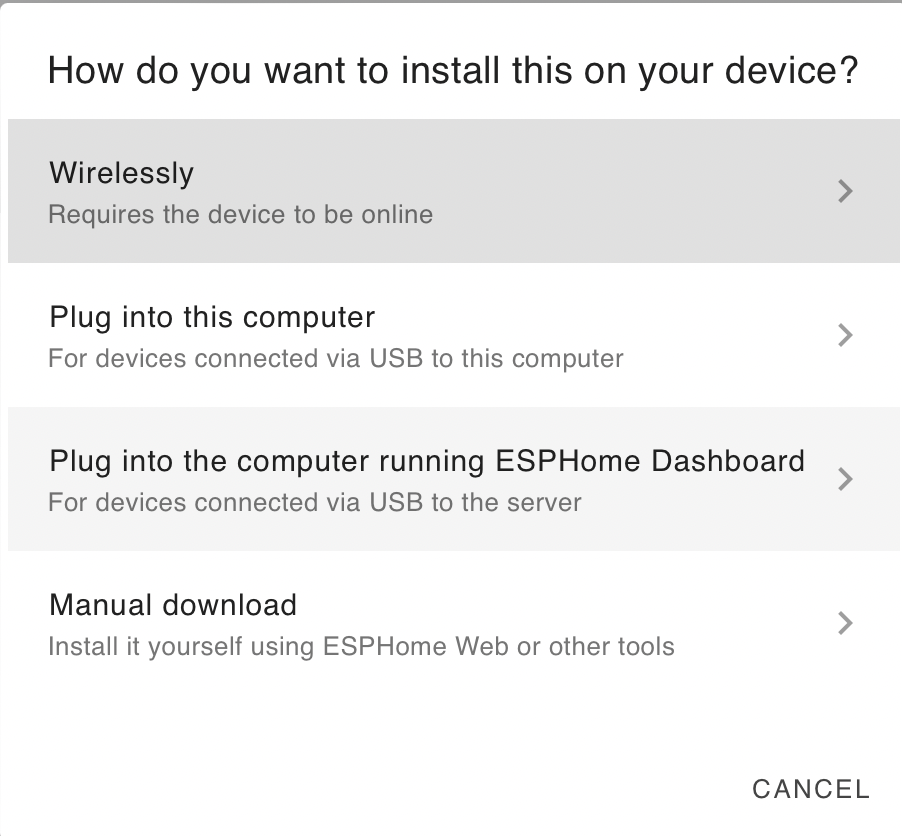
Now you'll be asked how you'd like to communicate with your board, since it doesn't have a wireless configuration on it yet, and since we just plugged it into the Home Assistant server itself, select Plug into the computer running ESPHome Dashboard.
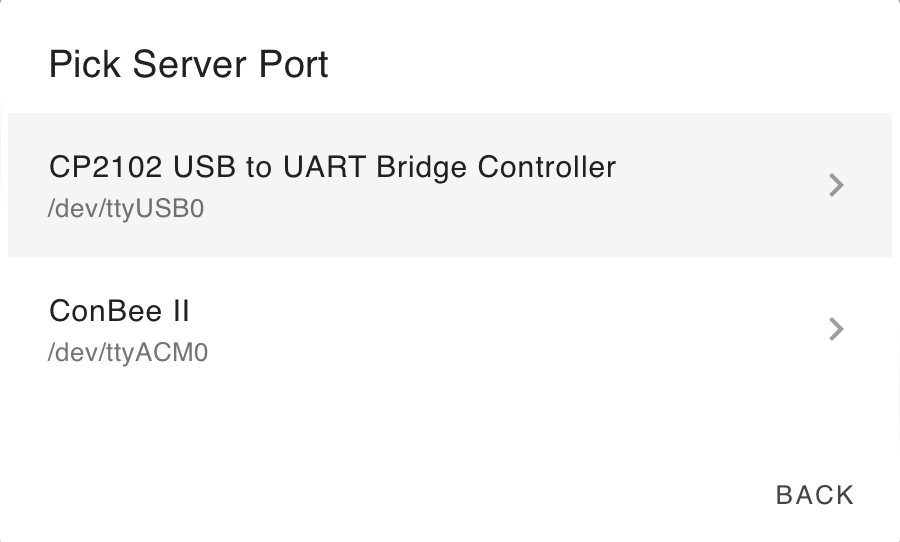
Now you have to select the USB port where your device is located. I only have two things plugged into the USB on my Home Assistant Server, my Conbee-II Zigbee controller and my ESP32 board, so select the right one ("CP2102 USB to UART Bridge Controller" for me).
You'll now be presented with a terminal window and you'll see lots of configuration steps flying by (in this screenshot it's called "sample.yaml", but yours should be "smartdry.yaml", as I already had that configuration defined so used another name). Wait until you see the line "setup() finished successfully!", before proceeding.
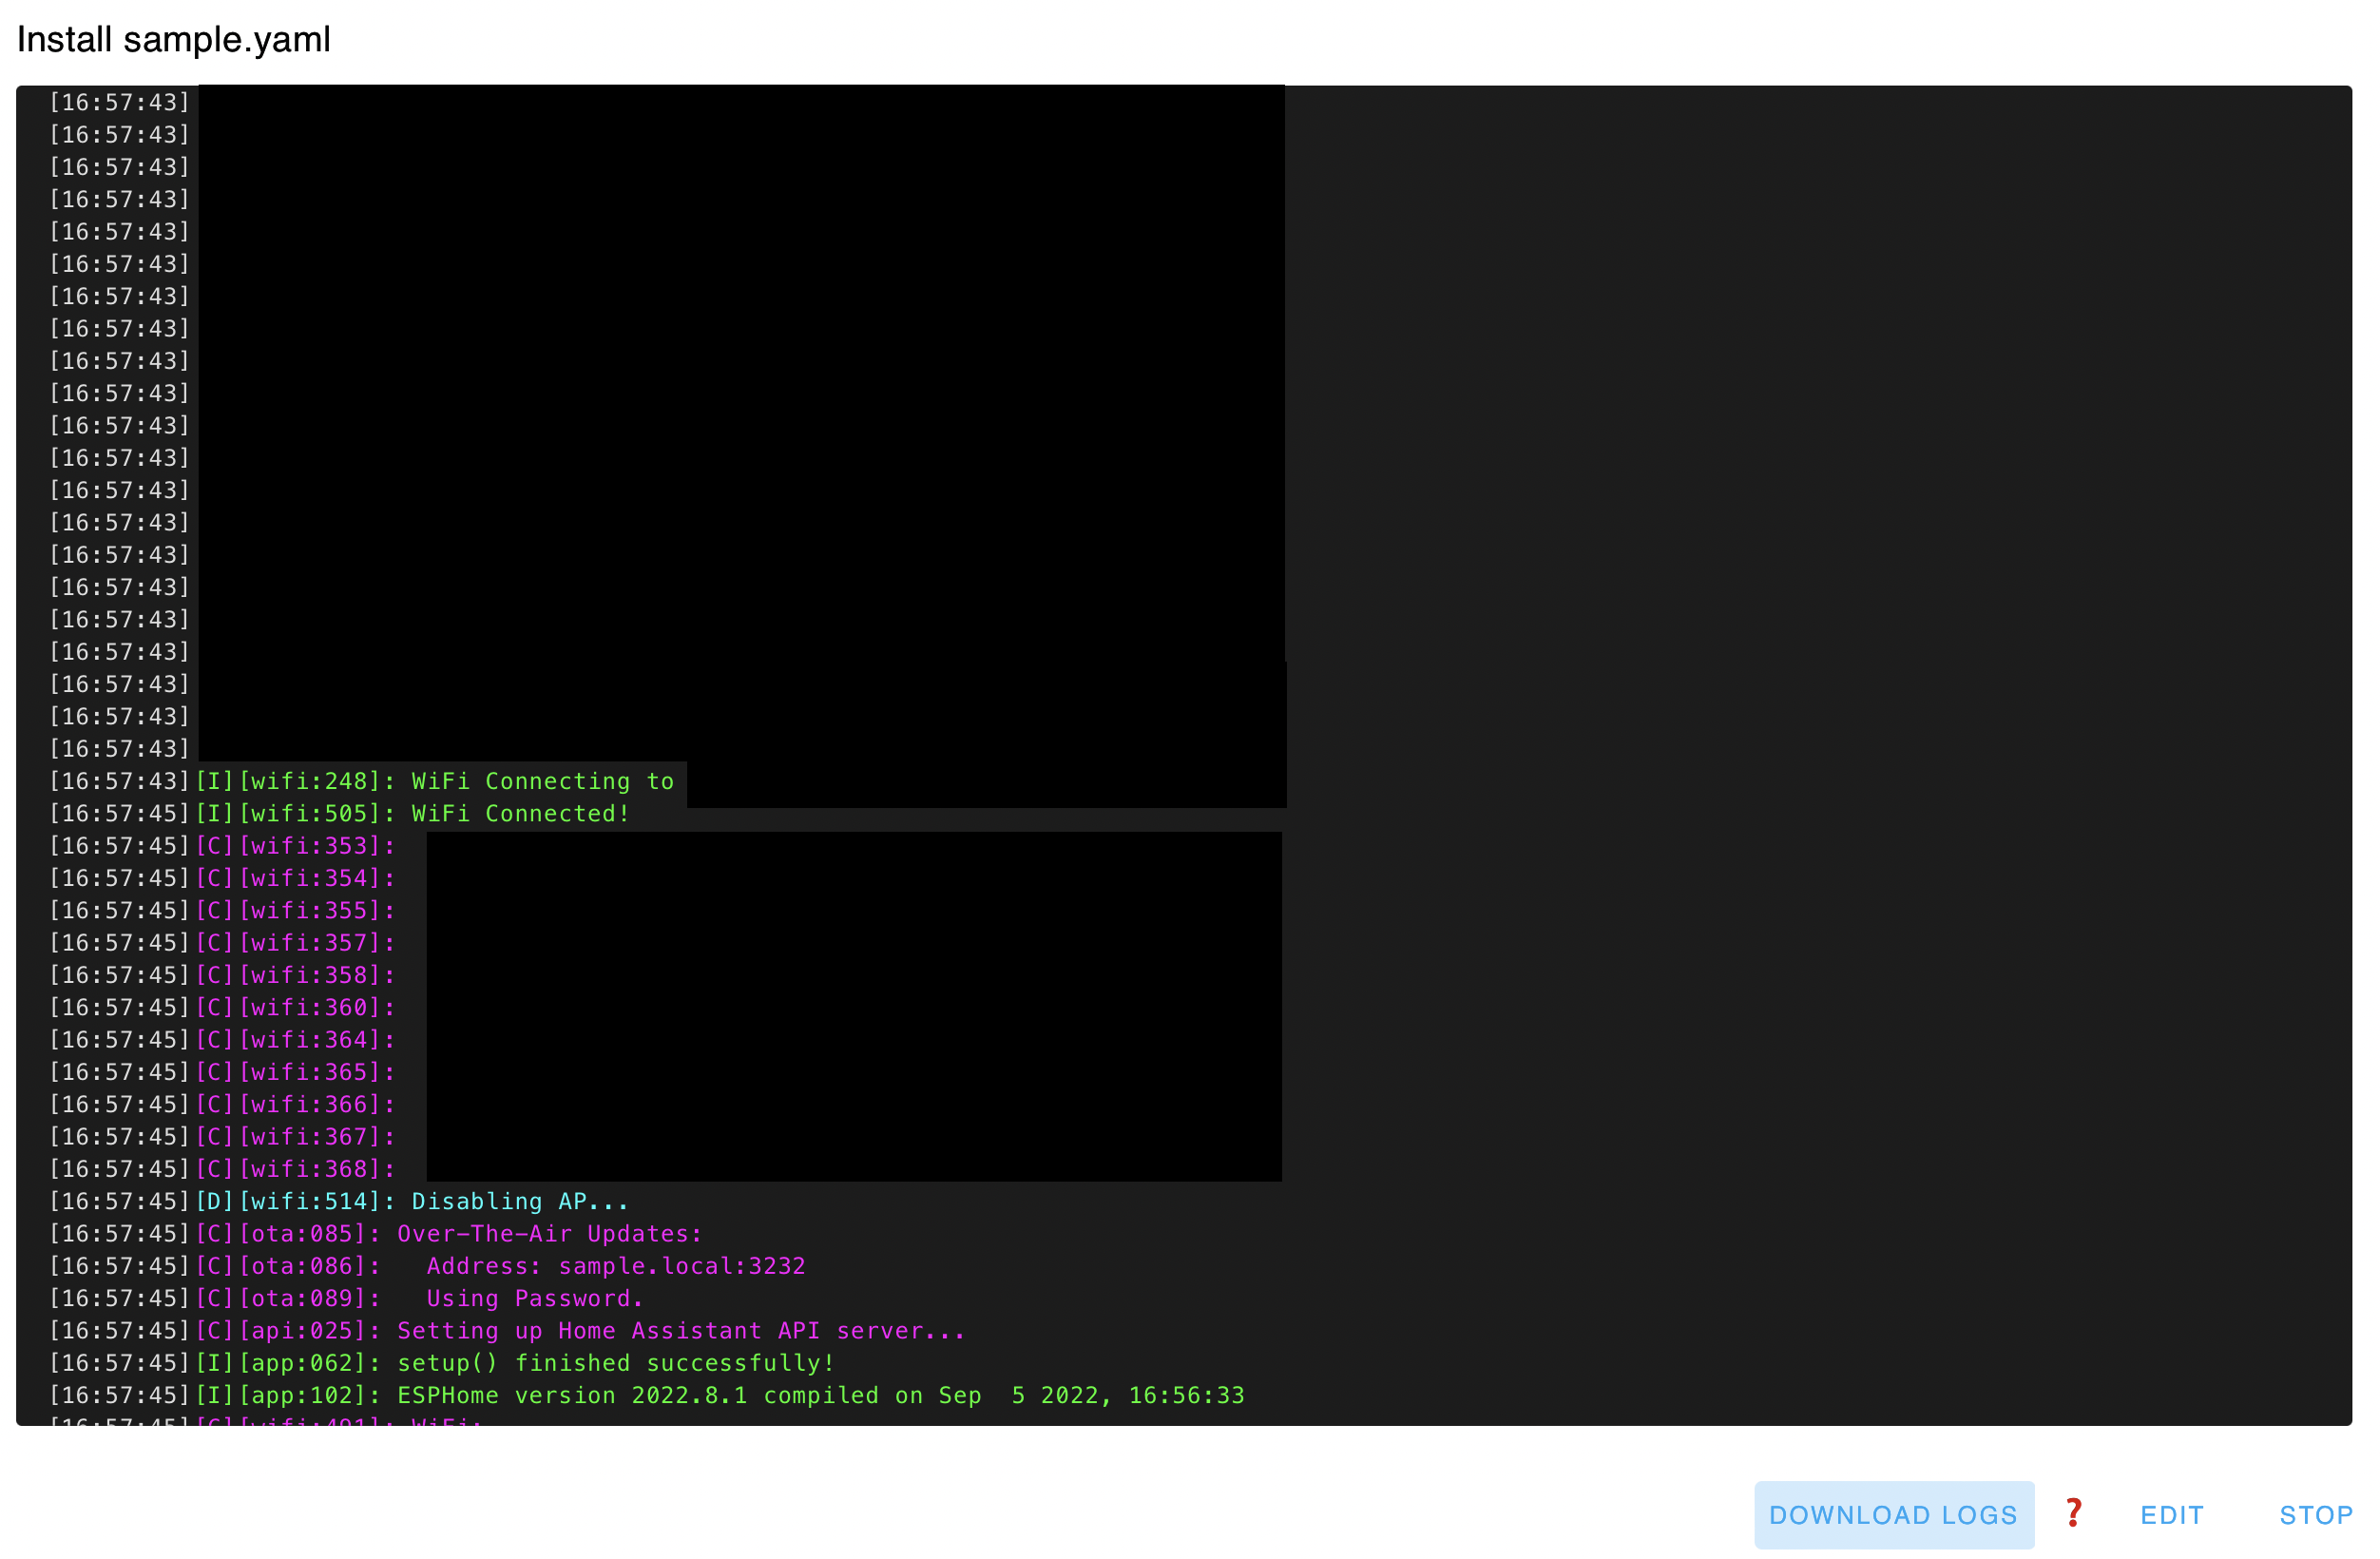
You should see in the areas I've redacted the device connect to your home network, receive DNS servers, and see signal strength. All of these mean your device was properly connected to your WiFi network. Once it's connected and working, you can safely hit the STOP button in the lower right to be returned to Home Assistant where you should now see your new device in the ESP32 Dashboard.
Loading your ESP32 Configuration for Home Assistant
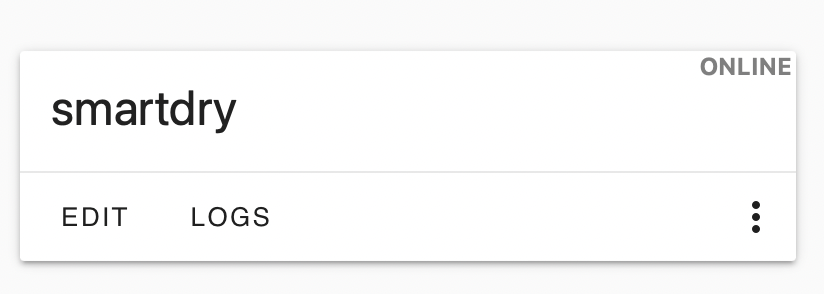
Now that the device is on your network and being managed by Home Assistant, you can unplug it from your Home Assistant server, relocate it to your laundry room near your SmartDry transmitter, and plug it into power. Give it some time to reboot and you should see it go "Online" within the ESP32 Dashboard.
Click the EDIT button and let's finish the configuration for your device.
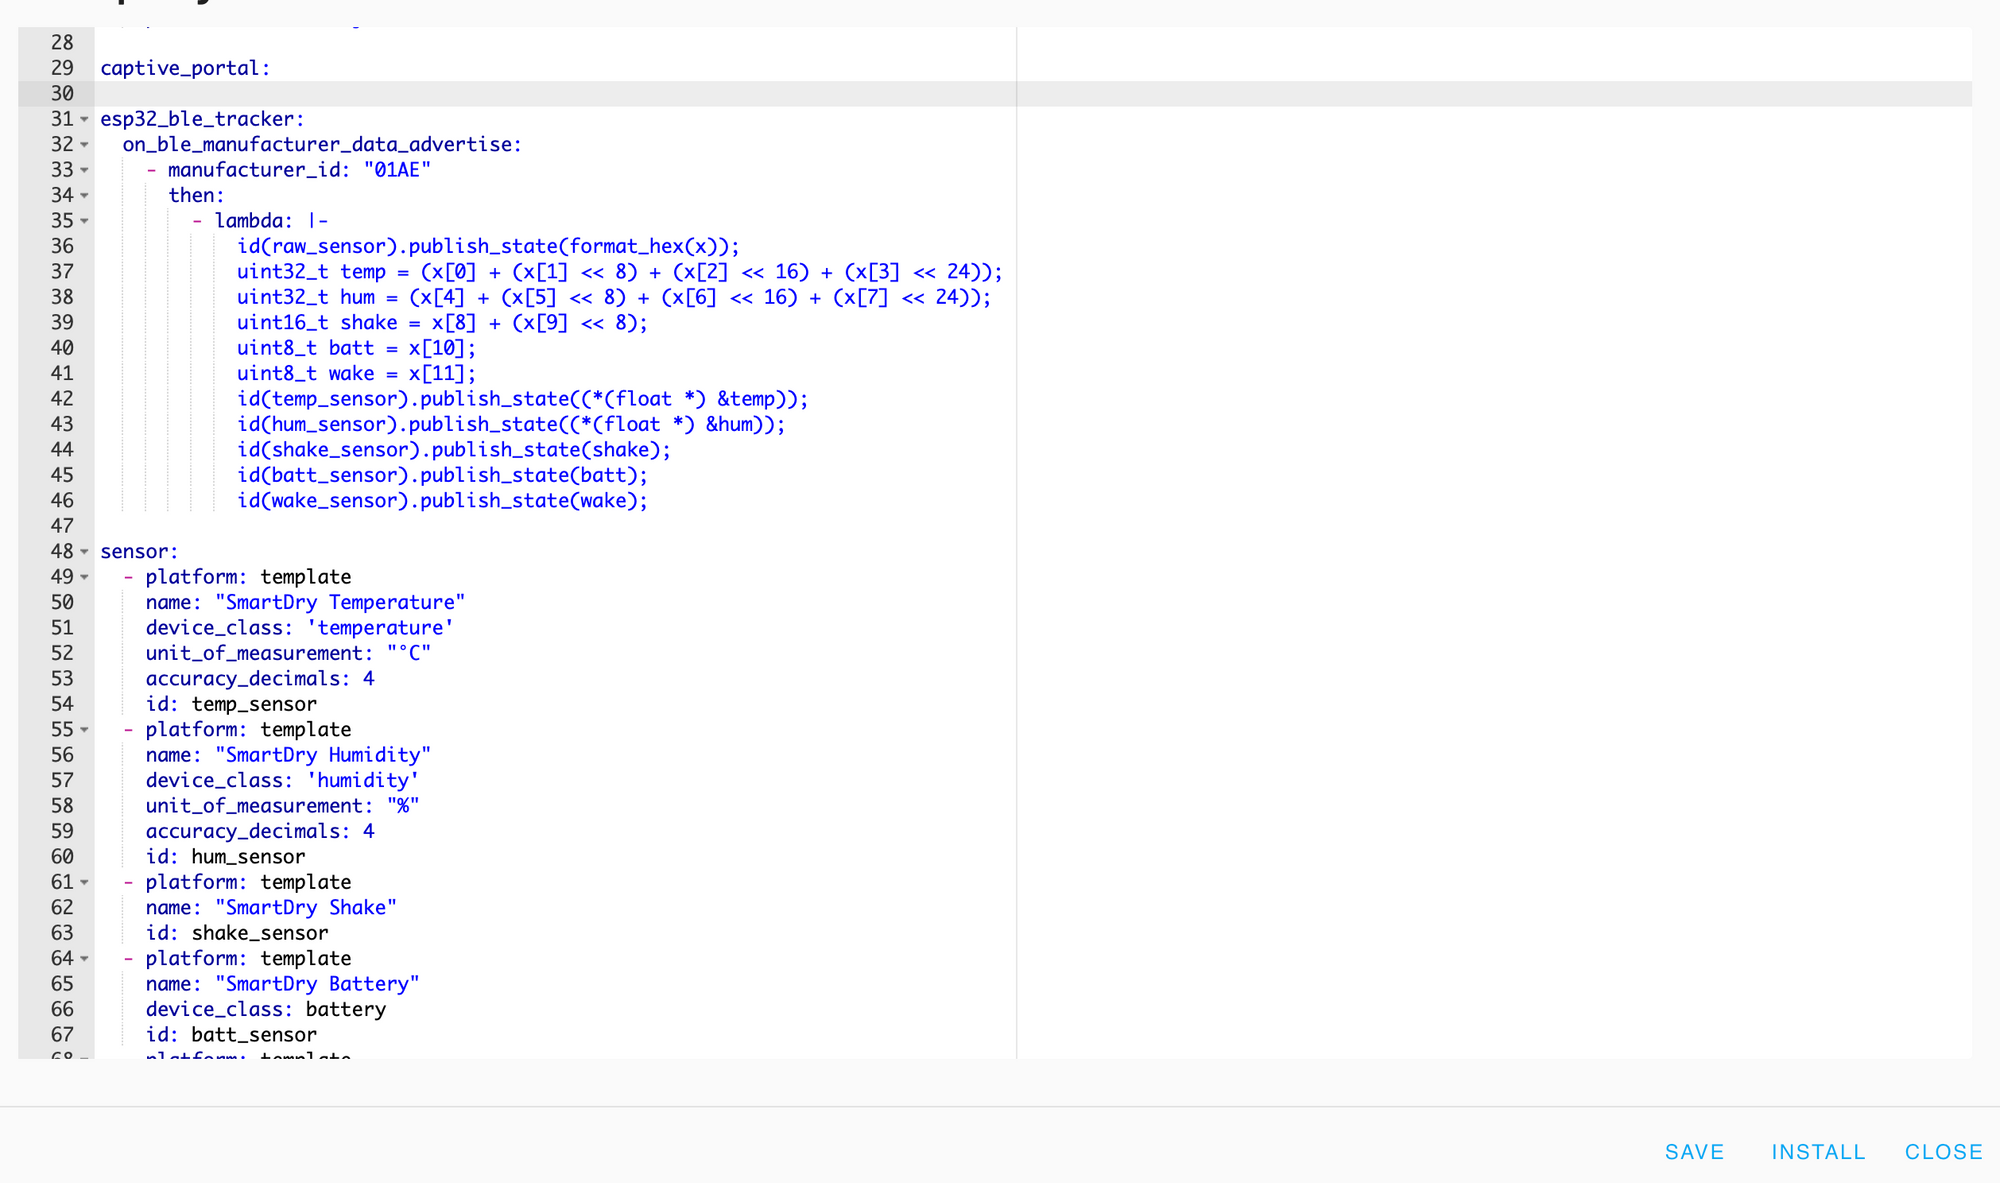
You'll be presented with a basic configuration file including an API encryption key, an ota password, your WiFi configuration, and a fallback WiFi configuration in case your network fails and you want to connect to it to configure the device without having to plug it physically into your Home Assistant server again. To make it find and present the SmartDry sensors, add the following code immediately AFTER the header for "captive_portal:"
esp32_ble_tracker:
  on_ble_manufacturer_data_advertise:
    - manufacturer_id: "01AE"
      then:
        - lambda: |-
            id(raw_sensor).publish_state(format_hex(x));
            uint32_t temp = (x[0] + (x[1] << 8) + (x[2] << 16) + (x[3] << 24));
            uint32_t hum = (x[4] + (x[5] << 8) + (x[6] << 16) + (x[7] << 24));
            uint16_t shake = x[8] + (x[9] << 8);
            uint8_t batt = x[10];
            uint8_t wake = x[11];
            id(temp_sensor).publish_state((*(float *) &temp));
            id(hum_sensor).publish_state((*(float *) &hum));
            id(shake_sensor).publish_state(shake);
            id(batt_sensor).publish_state(batt);
            id(wake_sensor).publish_state(wake);

sensor:
  - platform: template
    name: "SmartDry Temperature"
    device_class: 'temperature'
    unit_of_measurement: "°C"
    accuracy_decimals: 4
    id: temp_sensor
  - platform: template
    name: "SmartDry Humidity"
    device_class: 'humidity'
    unit_of_measurement: "%"
    accuracy_decimals: 4
    id: hum_sensor
  - platform: template
    name: "SmartDry Shake"
    id: shake_sensor
  - platform: template
    name: "SmartDry Battery"
    device_class: battery
    id: batt_sensor
  - platform: template
    name: "SmartDry Awake"
    id: wake_sensor
text_sensor:
  - platform: template
    name: "SmartDry Raw"
    id: raw_sensor
It should look like this:
Click SAVE and then click INSTALL to apply the configuration to your ESP32.
Congratulations!
You should now have a working ESP32 receiver that will expose the listed sensors in your Home Assistant: Temperature, Humidity, Shake, Battery, Awake, and Raw.
Caveats
There are several caveats that we've found over the last bit of time and changes to the configuration may happen to address them. The biggest issue we've found is that the SmartDry does NOT send updates unless it's actually "awake" (or "shaking"). This means that the battery sensor is "unreliable" when the device isn't working. It's a minor pain, but it could be fixed with an automation that checks if the device is "Awake" and if it is updates a separate Battery sensor, and if not, leaves it reporting the last value it saw. More to come...