You can’t pick up a technical magazine, hang out on Twitter, or read an article on a technology blog without hearing the phrase: Cloud Computing. What is cloud computing? Wikipedia defines it as “Internet-based computing, whereby shared resources, software, and information are provided to computers and other devices on demand“. That definition is pretty good, but what does it actually mean?
Cloud Computing provides businesses and consumers the ability to create on-demand resources and pay only for what you’re using. In the case of Amazon’s Elastic Compute Cloud (EC2) and Rackspace Cloud servers (or Instances as they call them) you can very quickly provision yourself a server, meeting your personal requirements, use it for a period of time you determine, and then remove it, drastically cutting down on the costs and complexities of building your own server or purchasing dedicated server resources.
So, let’s take a look at the various areas that you as a consumer should care about, starting with one of the more important areas: Pricing.
Pricing
Pricing is important. You’re talking about pay-on-demand server resources, so you want them to be economical. You also want the long-term pricing model to be competitive to dedicated servers, so you don’t have to spread things between providers. All prices are for basic Linux (Ubuntu 10.04), both services also offer Windows servers (at a higher price) and other Database options.
Amazon EC2
Amazon provides multiple Instance options, depending on what you need:
- Small Instance (the default): 1.7GB of RAM, 1 CPU Core, 160GB of Storage, 32-bit platforms only
- Large Instance: 7.5GB of RAM, 2 virtual cores, 850GB of Storage, 64-bit platforms (and 32-bit if you wish)
- Extra Large Instance: 15GB of RAM, 4 virtual cores, 1.7TB of Storage, 64-bit platforms (and 32-bit if you wish)
Note: Amazon EC2 also can provide High-Memory, High-CPU, and Cluster capable Instances (not covered here).
These various options come in 3 different Pricing Options:
- On Demand – Pay by the hour that the Instance is running ($0.085/hour for Small, $0.34/hour for Large, $0.68/hour for Extra Large)
- Reserved – Pay by the year ($227.50/year for Small, $910/year for Large, $1820/year for Extra Large), additional discounts for additional years
- Spot – These are different, you specify a maximum you’re willing to pay/hour and as long as the price is below that, you get it. If the price increases (because demand for these types of Instances is growing) above your maximum, the Instance is terminated. Since the prices fluctuate, all I can give you are the current prices: $0.031/hour for Small, $0.14/hour for Large, $0.233/hour for Extra Large (about 1/3 of an On Demand at the moment)
All of Amazon EC2 sizing and pricing are available here: http://aws.amazon.com/ec2/#pricing
RackspaceCloud
RackspaceCloud doesn’t have nearly the complexity in picking an Instance, but they do give you more granularity in the configuration (and price):
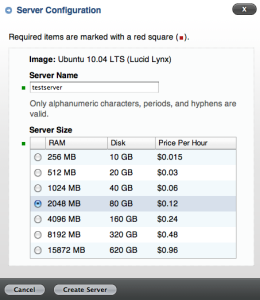
- 256MB RAM, 10 GB Disk: $0.015/hour
- 512MB RAM, 20 GB Disk: $0.03/hour
- 1024MB RAM, 40GB Disk: $0.06/hour
- 2048MB RAM, 80GB Disk: $0.12/hour
- 4096MB RAM, 160GB Disk: $0.24/hour
- 8192MB RAM, 320GB Disk: $0.48/hour
- 15872MB RAM, 620GB Disk: $0.96/hour
Pricing Winner
Amazon EC2 – Oddly, this is where I expected the newcomer, RackspaceCloud, to shine. Amazon’s smallest Instance, Small, is 1.7GB of RAM and 160GB of Disk, while the equivalent RackspaceCloud Instance is 2GB of RAM and 80GB of disk, but the RackspaceCloud Instance is around $26.00 more per month, for 80GB less storage. That pricing discrepancy is also just for the on-demand Instance. If you’re willing to commit to a reserved Instance at Amazon EC2, then the Amazon EC2 Instance ends up being about the same price as the low-end RackspaceCloud Instance. However, if you can get away with less RAM and Storage then RackspaceCloud does offer a 256MB Instance that’s cheaper than anything Amazon EC2 provides.
Signup
Amazon EC2
The Amazon.com EC2 signup is almost non-existant, provided you’ve already purchased something from Amazon.com previously. If so, you already have your EC2 account credentials. Just head over to http://aws.amazon.com/ and click Sign Up Now. As long as your credit card information is on file, and correct, you’re done. Amazon will just drop you at your AWS Management Console.
RackspaceCloud
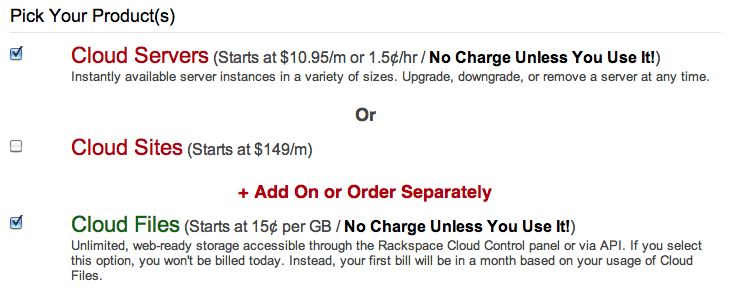
The RackspaceCloud signup is also a reasonably straight forward 4-step process:
- Choose one of the three product offerings

- Provide a username and password (password must meet strength requirements (which is better than Amazon’s requirements)
- Input your billing information (while they annoy you with an animated advertisement that drops from the top of the page offering financing options, Amazon didn’t have ads Edit: As pointed out in the comments, Rackspace doesn’t have ads. They do have a drop-down box if you pause too long on a page offering support options. That’s nice, but I would prefer something a little less obtrusive.). Note: For reasons beyond me, you also are required to enter an Organization/Company (um, it’s just me…), I put RobPickering.com
- Input your Credit Card information (I used Promotion Code REF-YY, I think it worked, there’s no feedback to tell me)
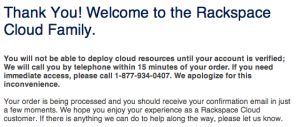
Now sit back and wait for your Welcome email from Rackspace. Oops! Wait a second, there IS NO WELCOME EMAIL, at least not yet.
Rackspace requires that someone actually call you, at the number you provided, in order to confirm your billing address and the last four digits of your credit card. They claimed that you’d hear back in 15 minutes, it took them about 25 to contact me. No idea why this step is required, it seems completely arbitrary, but make sure you provide a good phone number, that you can immediately answer, or you will have to call them at the number provided. Once you’ve talked to them and confirmed your information, the elusive Welcome email is forthcoming. Of course, I had to wait another 25 minutes for mine to arrive.
Signup Winner
**Amazon EC2 **– You’ve probably already got an Amazon.com account, so there really isn’t any sign-up. Regardless, tossing me an advertisement while I’m trying to sign-up for your service is just amateur, especially one that drops in the middle of the screen blocking the fields you’re asking me to fill out, then add the fact that I’m required to actually talk to someone, FAIL.
Launching an Instance
Amazon EC2
Launching an Instance on Amazon EC2 happens by first accessing your AWS Management Console. Once there, click the large “Launch Instance” button:

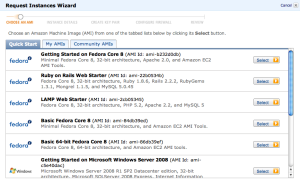
This will take you to a list of AMI (Amazon Machine Images) that you can use as the basis for your new server:
Amazon supports Fedora, Windows, and CentOS. That’s not a huge selection (no Ubuntu), but never fear. The power of the AMIs on EC2 is that you aren’t restricted to what Amazon supports as their Quick Start images.
There are also Community AMIs…over 5000 of them! So, you shouldn’t have a problem finding a server that meets your needs.
Once you’ve selected your AMI, you’re taken to another screen to select your Instance size (see above) and your Availability Zone. The **Availability Zones **are the different EC2 installations around the world where your server can run. You may not want all of your servers to be in the same data center. It’s up to you. However, keep in mind that servers in the same Availability Zone can pass data back and forth free of charge, and can share storage.
There are now two more tasks you have to perform to get your Instance launched:
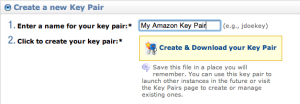
- Select (or create) a Key Pair for access (see Security)
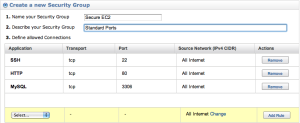
- Configure your EC2 Security Zone/Firewall (see Security)
At this point, your Instance will be provisioned and then booted for the first time. The entire process takes about 5 minutes and then you’ll be able to access your fresh, new server.
Rackspace Cloud
Launching an Instance for the first time under Rackspace Cloud is similar to the process outlined above for Amazon EC2. First access your Rackspace Cloud Management Interface.
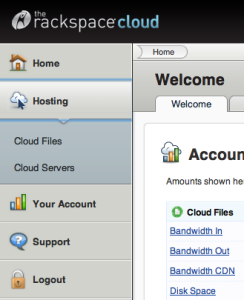
Once you’ve logged into your Rackspace Cloud account, select the Hosting button from the left-hand navigation, then select Cloud Servers.
The screen now displayed will be where all of your provisioned Instances can be found. To launch a new one, click the Add Server button.
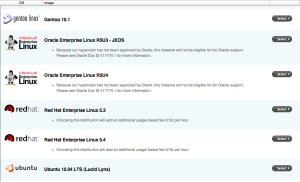
You will now be presented with a list of the available Operating Systems from which you can provision your Instance. Unfortunately, there are limited choices: ArchLinux, CentOS, Debian, Fedora, GenToo, Oracle Enterprise Linux, RedHat, Ubuntu, Windows 2003, and Windows 2008. There are no Community Images supported by RackSpace, so you won’t find specialized images to use, only base Operating System loads.
I selected Ubuntu 10.04 (Lucid Lynx). You’ll now be presented with a screen to select the hostname (this is a really nice feature that Amazon EC2 doesn’t provide, though you can manually alter it) and a **Server Size **(RAM), which will also determine your pricing.
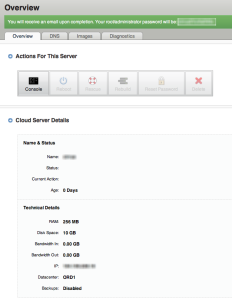
Once you’ve clicked the Create Server button, the instance is provisioned, assigned an IP address, and you are presented with a screen outlining your **root **account password.
You’ve now got a running Instance under Rackspace Cloud.
Launching an Instance Winner
A Draw – Both providers do a great job of getting an Instance up and running quickly. I almost gave this one to Amazon EC2, due to the enormous number of options you have for building an Instance using AMIs, however; Rackspace Cloud has a nicer user interface and gives you some smaller options for servers, as well as the nice ability to set your hostname at boot.
Security
I had planned for the next section to be a discussion of the various ways you access your Instance. However, after my experiences with Rackspace Cloud, I felt it to be critically important to discuss the security of the two offerings before showing you how to access your servers.
I’m very passionate about security. Once you have suffered a breach, virus, trojan, worm, or any other security issue, you cannot get back your sense of security. In most cases, your best option is to scrap the entire system and start over. This is why I was shocked at the extremely low amount of security that Rackspace Cloud enforces. Before I get to that, I’d like to discuss the security controls that are in place at Amazon EC2.
Amazon EC2
Amazon EC2, when creating your Instance, will have you configure two items as outlined above: A Key Pair and a Security Zone. Let’s take a look at each of these security measures and how to use them.
Key Pair: The key pair is a requirement for building an Amazon EC2 Instance. When you’re creating your first Instance, Amazon will force you to create a Key Pair, giving it a name and then automatically downloading the Private Key to your computer. SAVE THIS IN A SECURE PLACE. This private key is downloaded to you, and IS NOT retrievable again. You will require this Private Key in order to access your Instance for the first time.
Security Zone: The Security Zone is a firewall that rests ON TOP OF your Amazon EC2 Instance. It will override any and all firewall rules you later place on your Instance. I love this about Amazon’s EC2 service, because it allows me to create granular security controls on my Instances BEFORE they are exposed to the public Internet. Additionally, I can use the same Security Zone for each of my Instances, performing updates to all of them without having to revisit each one individually. When you’re creating your first Instance, Amazon will force you to create a new Security Zone, giving it a name, a description, and setting up any port controls you want beyond the defaults. The default behaviors of the Security Zone you create may depend on the type of Instance you chose to create, for this article I selected the Fedora Core 8 LAMP Web Starter Instance, which gave me a Security Zone that allowed open access via SSH, HTTP, and MySQL. However, if you wanted to tighten down any of these, you can remove them from the default provided, then re-add the protocol with more specific IP sources, all before the Instance is created.
The only way you are going to be able to access your Instance, by default, is going to be by using the Private Key of the Key Pair you created. I’ll talk more about using these keys, and getting rid of these keys, below under Accessing your Instance.
Rackspace Cloud
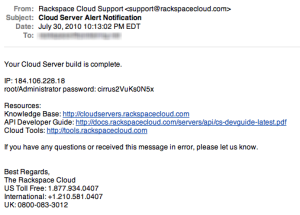
Rackspace Cloud doesn’t have any security. Update: Rackspace DOES have Security, but with regards to Securing your initial Instances, they don’t. In fact, they make it worse than I could have imagined. When you first create your Instance, they will provide you the root account password on your screen. That’s not too bad, they have to provide the password to you some how, at least the session is TLS encrypted, so you should be the only person that now has this. However, then they do something completely bone-headed. THEY EMAIL IT TO YOU! I was shocked, visibly shaken, when my email client dinged and there was my Instance name, IP address, and root account password. They had just sent it, in clear text, over the public Internet, to some random mail server that may or may not be in my control. Yay! Furthermore, by default, you can SSH into the root account, and there are no blocks on where you can source SSH connections to the Instance, nor can you set these up before the Instance is created. So, from the time the Instance is created, to the time you log into the Instance and secure it (see below), anyone who can intercept your email has complete and full access to the root account of your Instance. You may not care, but I certainly do. Here’s the email I got:
So, they’ve provided a would-be attacker my IP address, my Hostname (it’s part of the password, which is even worse), and the password to the root account. Everything needed to take over my Instance remotely. I can of course destroy the Instance when I find out someone has accessed it, but then I have to rebuild it myself. So, at a minimum, please immediately change your root account password the moment you log into your server, and double-check your log files to ensure no one accessed the server before you did. Better yet, secure your Instance the way Amazon EC2 is secured by default, and completely ignore the use of passwords. (Yes, I’ve destroyed the above instance, so please don’t hassle poor IP 184.106.228.18, as it’s no longer mine and you’ll get in trouble). I also cannot understand why Rackspace includes the hostname as part of the “random” password. Once you’ve included non-random components in the password, you lower the overall strength of the password, it appears pointless.
Overall Security Winner
Amazon EC2: No contest. I think the above speaks for itself.
Accessing your Instance
The most important aspect of having a server in the Cloud is accessing it. I’m going to show you how to gain access to your newly created Instance as well as some immediate security steps you should take once you’ve gained that access.
Amazon EC2
You’ve launched your EC2 Instance, now log into it. When you created your Instance, Amazon downloaded the Private Key of your Key Pair to your computer. To use this Private Key (in my case I called it MyAmazonKeyPair.pem) under a Unix-based operating system (like a Macintosh running OSX), perform the following steps:
- Save your Private Key file to your Desktop (or anywhere else, these examples assume on your Desktop)
- Open **Terminal **(it is found under Applications -> Utilities)
- Change directory to your Desktop:
cd Desktop - Change the permissions on your Private Key, or you’ll get an error:
chmod 600 MyAmazonKeyPair.pem - Run ssh:
ssh -i MyAmazonKeyPair.pem root@ec2-Your-IP-Address>.compute-1.amazonaws.com
You should now be logged into your Instance as root. Quick note, some of the Ubuntu AMIs on Amazon.com have the root account disabled for ssh by default (which is one of the best things about them, see below for doing this yourself), so in that case you’ll have to ssh in as ubuntu. Just replace root with ubuntu in the above ssh command.
Rackspace Cloud
Accessing your Rackspace Cloud Instance comes in two flavors, one of which is something Amazon EC2 doesn’t provide: Console. The first method to access your server is straight SSH, this is a simple affair since they’ve so thoughtfully provided your root password:
- Open Terminal (it is found under Applications -> Utilities)
- Run ssh:
ssh root@Your-IP-Address>
You should now be logged into your Rackspace Cloud Instance as root.
The second method to access your server is via Console. To perform this type of access:
- Log into your Rackspace Cloud Management Interface
- Select Cloud Servers under the Hosting tab
- Click the name of the server you wish to access
- Click the Console button. Use the same root account and password to access the server
Initially Securing your Instance
In both cases both Amazon EC2 and Rackspace Cloud allow root access to the Instance over ssh. This is a Bad Idea™. So, to properly secure your Instance and give you a more secure method to access it:
- Log into your Instance
- Add yourself a local account, make sure to add this account to the wheel group:
# useradd -G wheel <em>account</em> - Set the password for the new account:
# passwd <em>account</em> - Edit the /etc/sudoers file to allow your new account to perform commands:
# visudo - Remove the comment from the following line in sudoers, I do the second line so I don’t have to use a password every time:
## Allows people in group wheel to run all commands<br></br>
# %wheel        ALL=(ALL)       ALL<br></br>
## Same thing without a password<br></br>
%wheel  ALL=(ALL)       NOPASSWD: ALL```

At this point, you have a local account on your Instance, which you can access over ssh, once logged into your Instance, you can issue any command as **root** by preceeding it with the command **sudo**.  To learn more about using **sudo** see this article at [Wikipedia](http://en.wikipedia.org/wiki/Sudo).  If you’re using Amazon EC2 you have a couple of additional steps you need to take, because EC2 instances require the use of your **Private Key**.  After you’ve edited the **/etc/sudoers** file, perform these steps on your Amazon EC2 Instance:

1. Change to your new account’s home directory:
`cd /home/<em>account</em>`
2. Create a .ssh directory:
`mkdir .ssh`
3. Copy the authorized_keys file from root to your new account:
`cp /root/.ssh/authorized_keys .ssh`
4. Set the proper permissions on the .ssh directory and its contents:
`chown -R <em>account</em>:<em>account</em> .ssh`

You can now access your Amazon EC2 *account* using your Private Key.

#### Accessing your Instance Winner

**A Draw**:  Both environments give you relatively easy access to the server Instance.  Rackspace Cloud is super easy, just ssh there as **root** using the password they emailed you and you’re in.  However, that ease of use comes at a very high price to the security of your installation, so buyer beware.  I’m not going to ding Rackspace Cloud twice on security, even though I should.  On the other hand, Amazon EC2 doesn’t provide **Console** access to your Instance, which can provide you emergency access if something goes wrong or you lock yourself out through a bad firewall command.

### Overall Winner

**Amazon EC2**:  With three outright wins and two draws, Amazon’s Elastic Compute Cloud server Instances come out on top in my review.  They provide better overall pricing, easier account signup, better Instance creation options, MUCH better security, and similar access options.  Rackspace Cloud is the new kid on the block for Cloud Computing and on-demand Instances, but they need to make some major changes to their overall service if they are going to give Amazon EC2 serious competition going forward.

### Further Discussion

If you liked this article, and you enjoyed reading it, please take a few moments and Digg, Tweet, Buzz, or Stumble it above to let others know about it.  Additionally, if you have comments about it, just click the Comments link.  I thoroughly enjoy differing opinions and discussions.
