
The only login account I have on my MacBook Pro is no longer an Admin account and is now listed as a Standard user. What does that mean? Well, if you want to upgrade any of your applications, install new ones, or change System Preferences, it means you cannot.
The Setup
It all started out simply enough, I had a misbehaving application (Keybase) which everytime I rebooted would ask me to install a helper application and upon going through the process, it would inevitablly fail with some cryptic error. I "Googled" some solutions and eventually stumbled upon an article that suggested the following sequence of commands would resolve it:
sudo dseditgroup -o edit -a $(whoami) -t user admin
keybase update check
sudo dseditgroup -o edit -d $(whoami) -t user admin
I should have paid more attention.
I shouldn't have just run the commands as listed.
I should have spent more time recognizing the danger in the above.
The first warning sign was the use of sudo to add my local user account ("$(whoami)") to the admin group. The fact that I can run sudo in the first place means I'm already in the admin group! But, I didn't pay attention, and I ran the above commands.
It took a few days, but I eventually had a software update for one of my applications and while it was running, it prompted me to login with an administrator account...huh? Why do I need to login with an administrator account? No worries, I'll just log into my local account... shakey-shakey, nope. Uh oh. Wait a moment, what is going on? I checked my Users & Groups and saw the following:
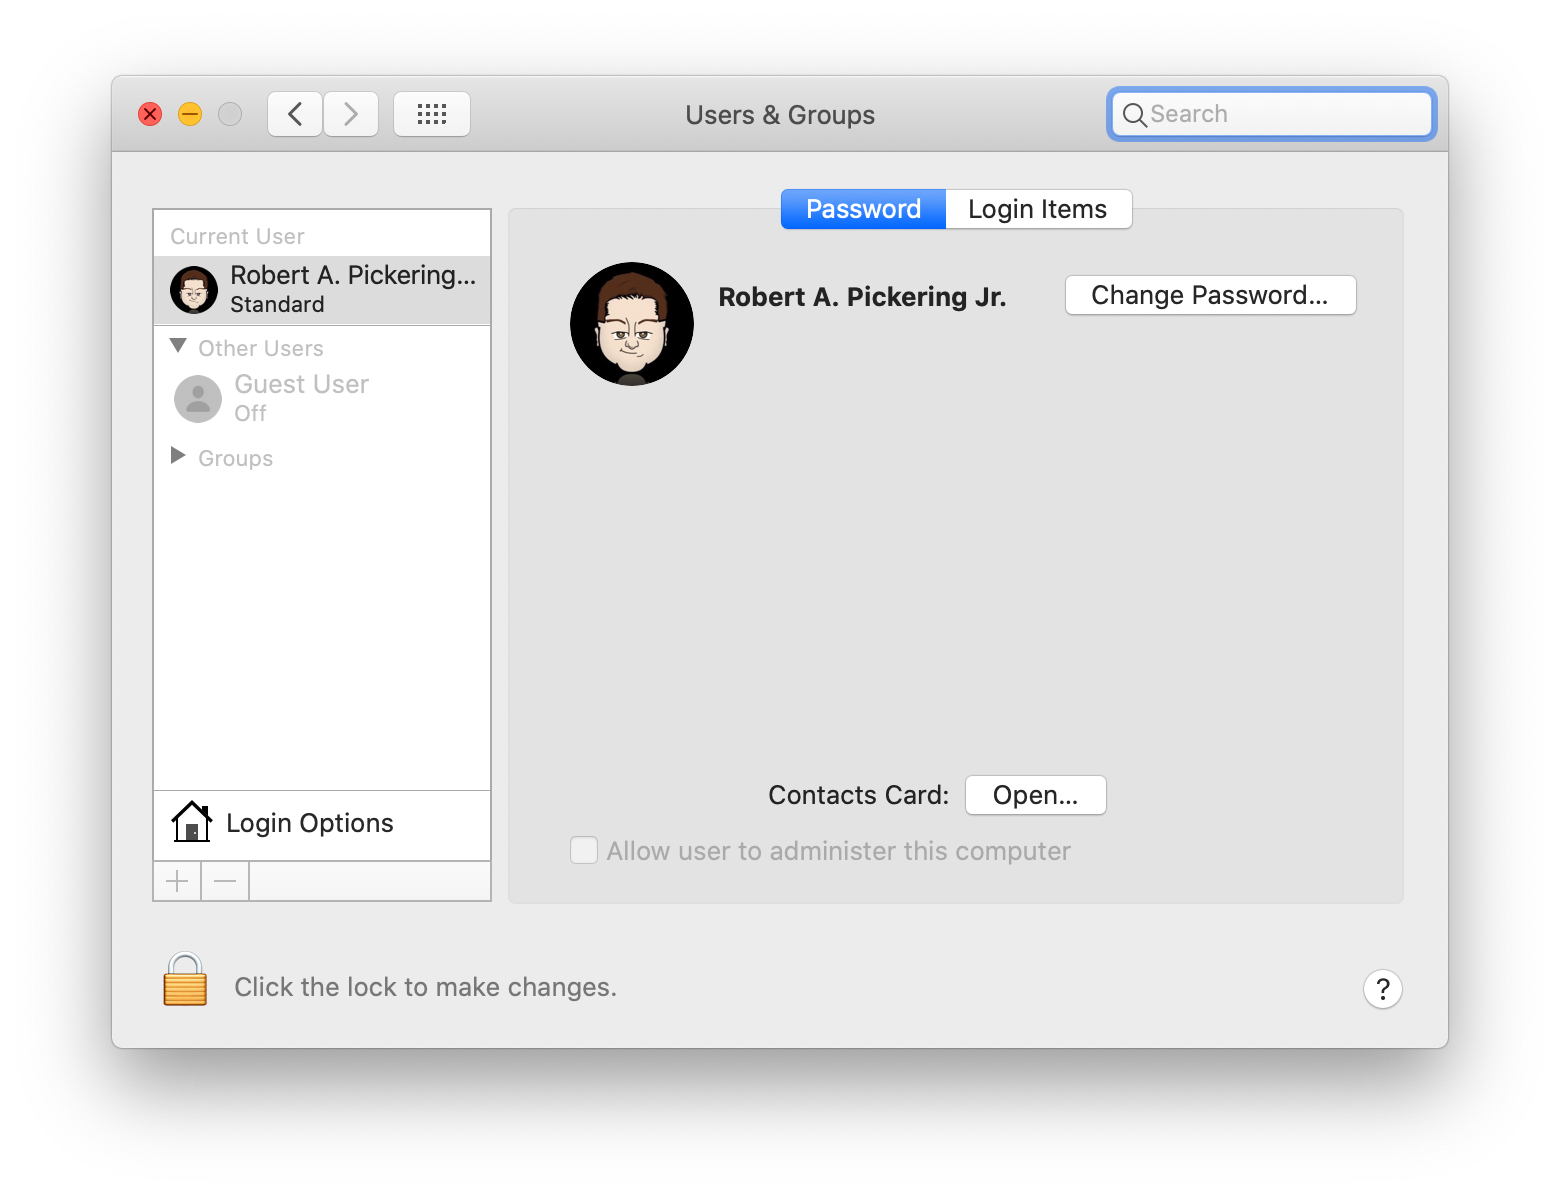
What?!?! My user account is listed as a Standard user? That's going to be a BIG problem! Especially because I don't have any other accounts on this system that are an Admin user. You see, that third command above? The "-d" means "delete", so it actually removed my local user account from the admin group, converting it to a Standard user account that no longer had access to administrative commands on the system.
No Big Deal
My first thought was that as a Standard user, I would be prevented from automatically running administrative commands, but that surely if I provided authentication I'd be able to run sudo (substitute user) commands. Nope. On macOS, the sudoers group is also the admin group, so if you're not in the admin group you cannot run sudo either. So, I wouldn't be able to run the appropriate dseditgroup command and fix this problem.
My second thought was, "no big deal". I mean, I'm "Unix Guy", I have physical access to the system, there are tons of ways I can fix this problem using my 30 years of Unix background...I'll just boot "single user". Most operating systems have a method to boot them with administrative rights in a limited use fashion, so you can then fix local issues with the system. On Unix-based systems this is called "single-user mode". On a macOS system, you boot into single-user mode by holding down the ⌘-S while the system is booting. So, that is what I did...
It Didn't Work
This is where my troubles began. Booting single user just showed me a verbose boot sequence (lots and lots of status commands and running process information) and then my system booted normally, taking me to the login window where I could log in with my Standard user account. Um...wait...what? Why isn't single-user mode working when I specifically boot into single-user mode? Enter FileVault.
FileVault is Apple's full disk encryption solution, now in it's second iteration or "FileVault 2". I personally highly recommend that you enable FileVault 2 on any of your macOS systems as it adds a completely transparent, well mostly, layer of protection in case your system is lost or stolen. However, it does add some complexity from time to time, and booting single-user is one of those times. Apparently, if you have FileVault enabled on your system, single-user boot is effectively disabled, because there's no way to unlock the data volume during boot. Frankly, this could have been worked around by Apple relatively easily (the boot volume itself isn't encrypted, so just boot the system then prompt for a username and password to unlock the data volume), but Apple is adding another layer of protection by disabling single-user mode when you have a FileVault protected system. Unfortunately, that means your options are severely limited in order to recover your admin rights.
Trying to Find a Solution
At this point, I turned back to Google to see if I could find a way to recover my admin rights...and every single search I followed took me to booting single-user.
Fortunately, I eventually found an article from 2013 that talked specifically about booting single-user on a FileVault-encrypted system. Except, it didn't work either. Apparently, Apple has since changed this and it is no longer possible to boot directly into your system via single-user if you have FileVault enabled.
Apple's official documentation for booting single-user mode is also inaccurate. In that article it talks about booting into Recovery Mode and then mounting the FileVault 2 volume and that you "can now issue UNIX commands". While this is technically true, the problem is that any commands you're issuing will be performed in the booted OS, which is your Recovery Partition, and not your actual system disk. That's okay for manipulating the file system, but if you want to alter your Open Directory (e.g. you want to issue a dseditgroup command) it will operate not on your normal boot volume, but on the Recovery Partition itself. So, this "single-user mode" that Apple is describing won't let you reassign your user account to the admin group. However, it is a part of the solution.
macOS Setup Wizard
When you first got your shiney new Mac, Apple took you through a Setup Wizard to configure your computer for its initial start up. One of the things that was done was to establish your initial user account, and set it up as an Admin user for the computer. It's possible to trick your Mac into re-running this Setup Wizard again and have it establish a new Admin account on your system.
In my search for ways to re-establish an Admin account, I found this StackExchange article where they, again, described booting your system into single-user mode (which won't work if you have FileVault 2 enabled). However, the top answer's solution did in fact have a hidden gem: /var/db/.applesetupdone
Turns out that the /var/db/.applesetupdone file on your Mac is what tells macOS that the Setup Wizard has already been run. If you remove it, macOS will dutifully run the Setup Wizard and allow you to create a new Admin account on your system.
Putting it All Together
Here is the full solution, step-by-step:
- Follow the instructions at Apple to boot into Single User Mode and get a Terminal
- From the terminal, issue these two commands, the first will take you to your Data volume (Note: the name of your particular data volume may be different, use df to find it), the second will remove the .applesetupdone file:
cd /Volumes/Macintosh\ HD\ -\ Data
rm ./var/db/.applesetupdone- Reboot your Mac and go through the Setup Wizard. Create a new Admin account, making sure you use a DIFFERENT username than your Standard user account (e.g. "Super User")
- After logging in to your Mac as the new Admin user, run System Preferences
- Select your Standard user account and check the box labeled "Allow user to administer this computer" (Note: if the box is grayed out, click the lock icon the lower left to enabled editing)
- Log out of your Mac and log back in as your original account
- Either delete the Admin account you created in step 3 above, or leave it as a backup (see below)
- Rejoice! You've recovered your Admin privledges!

Installing a Backup Admin Account
Having a backup Admin account is a good idea, that way you always have a second way to establish administrative rights on your system. An even better idea is to always run your primary account as a Standard user, so that when you need administrative rights, you have to authenticate as a completely different user (that second Admin account for example). If you're interested in this concept, here's an article on not only creating a second Admin account, but taking it one step further and "hiding" it so that casual users of your computer will not know it exists. Note: while the article gets you most of the way there, you'll notice that even after setting the UID to below 500, your "hidden" account still won't be hidden. That's because in recent versions of macOS (definitely in Catalina), hidden users aren't hidden by default. To enable users with a UID below 500 from being shown you'll need to run the following command:
sudo defaults write /Library/Preferences/com.apple.loginwindow Hide500Users -bool YESOne you run that command, the account you created should disappear from both the Users & Groups as well as the initial Login Window.